Mark wanted a simple celebration at home. But it felt off without a cake (and our five year old son, Tikoy, insists there should be cake). It would be weird to ask Mark to make his own as baking is his turf at home, yet I don’t have the patience to bake with all its proper measuring, folding, and mixings. So, I decided to brave baking berry cheesecake. (All I ever made before were the no-bake ones).

It was nerve-wracking! I researched a lot as though it’s rocket science. But I had to make do with what I had. I wasn’t sure if my computations to fit a smaller baking pan was correct, and the initially-planned berry swirl topping sank—together with my heart.

Needless to say, I prayed so hard that the cheesecake would pull through and that it was edible, at least. And I had to improvise a new topping. Thankfully, I was able to order some fresh blueberries and strawberries through Food Panda at the last minute.
The last concern was how to hide it from Mark (since I had to bake a day before for the cheesecake to set properly), but apparently, hiding in plain sight works for most husbands. It was right there inside the fridge with only a foggy cake container. 😂
Anyway, here is the recipe, which I roughly based from Preppy Kitchen’s many cheesecake recipes.
Ingredients
Digestives Crust
180 digestives
70g butter, melted
1/2 tbsp white sugar
Pinch of salt
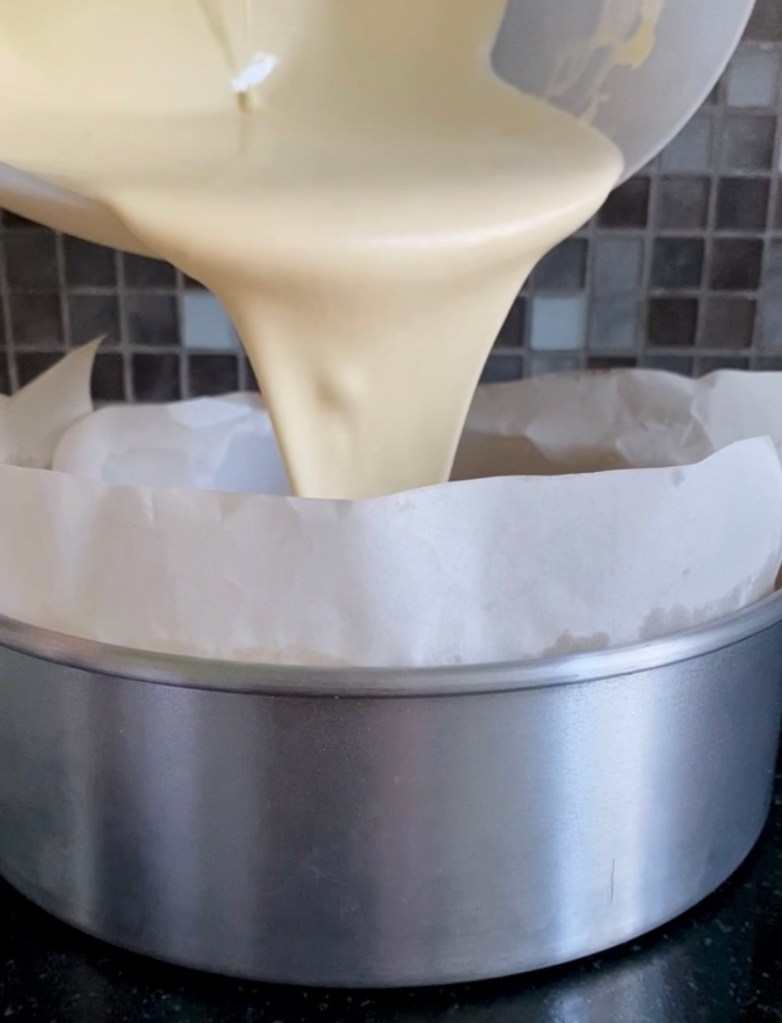
Cheesecake Filling
250g cream cheese, softened
150g sour cream
1 large egg
1 tbsp flour
3 tbsp white sugar
2 drops lemon essential oil (optional)
Splash of vanilla
Pinch of salt
Topping
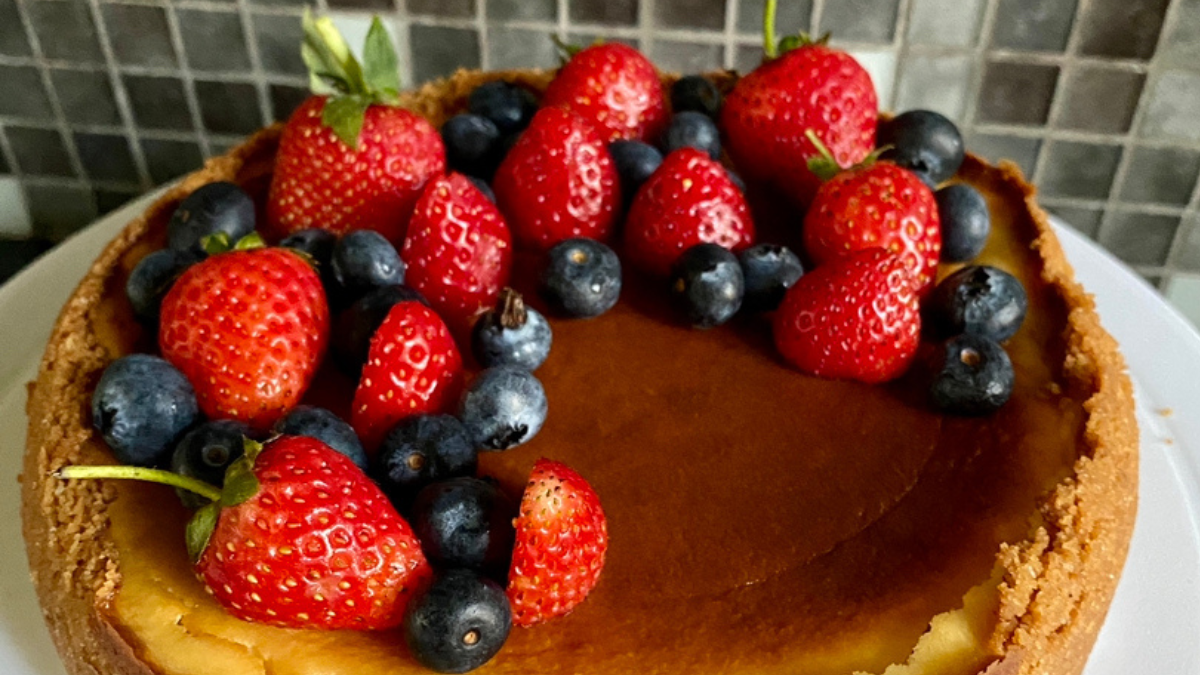
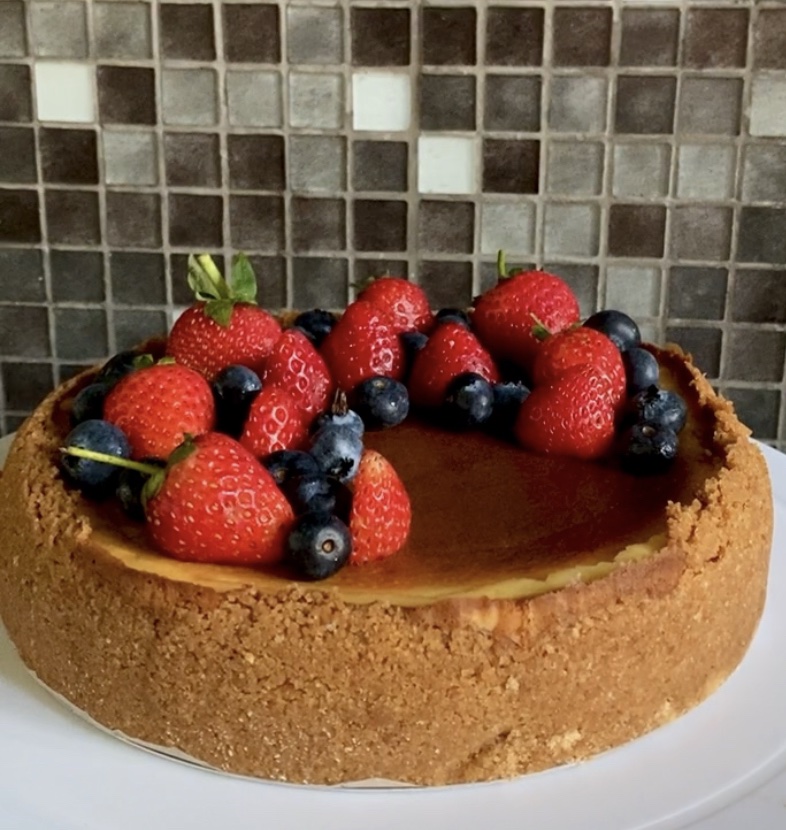
Fresh berries of your choice
You will need:
1 7-inch baking pan
Food processor (to crush the digestives, but you can also do it manually)
1 oven-safe pan for hot water
1 cup or glass to even out the crust
Hand mixer
Large bowl
Procedure
For the crust
1. Pre-heat oven to 180C.
2. Crush digestive cookies until fine. Add the sugar, salt, and melted butter and mix until it feels like a wet sand. When you press them together, it should hold the shape.
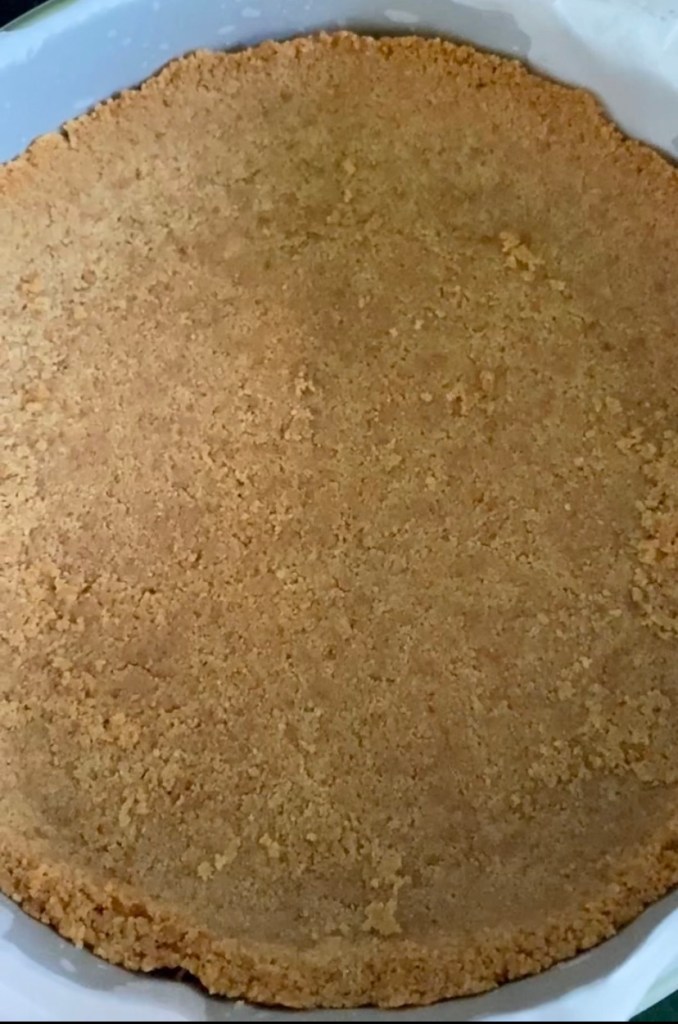
3. Press the crust mixture to the bottom and sides of the pan.
4. Bake the crust in 180C for 8 to 10 minutes, and cool it afterwards.
For the Filling:
1. Beat softened cream cheese on a bowl with your hand or stand mixer in medium-low speed until it becomes smooth. Scrape the bottom of the bowl and smoothen lumps. Add the sour cream, egg, sugar, salt, vanilla and beat until well combined.
2. Pour the filling onto the cooled crust.
3. Pour hot water into a pan and place it on the lowest rack below the cheesecake for even cooking.
4. Bake in 180C for 15 minutes. Bring down the temperature to 150C and continue baking for 30 minutes. The filling should rise a little and the center will slightly jiggle when you shake it.

5. Keep the cheesecake inside the oven for an hour. The oven should be completely turned off and the door slightly opened.
6. Cool the baked cheesecake in room temperature for another hour.
7. Chill overnight and decorate with berries.

8. When serving, let the cheesecake sit in room temperature for a few minutes for the perfect bite.
